Sunday, March 13, 2011

White Chocolate Brownies

I went on a quest, for a white chocolate brownie recipe! I searched the Internet and baking blogosphere only to find that there are very little white chocolate brownie recipes floating around out there! I decided to adapt a recipe from  What Megan's Making.  The result? A super fudgey yummy brownie! However, this was only try one, and I will be attempting to find the perfect white chocolate brownie recipe and report back when I do.

  • 1 1/2 cup white flour
  • 1 tsp salt
  • 1 bag white chocolate chips
  • 1 cup butter (if using salted butter, omit 1 tsp salt)
  • 2 cups sugar
  • 5 eggs
  • 1 tsp vanilla extract
  • 1 tsp almond extract
Batter before baking.
Grease a 9x13 inch glass baking dish. Preheat oven to 350 degrees. Combine butter and chips in a microwave safe bowl. Melt together in the microwave, stirring at 30 second intervals until melted. Whisk in sugar, add 3 eggs, whisk well. Add the remaining 2 eggs and extracts, do not over stir (the original recipe says over stirring can lead to cake-like brownies). Fold in flour and salt until combined. Bake for 30-35 minutes, rotating the pan half way though baking time.

When these first came out of the over, I thought they were under cooked. I cut into them and they did not look fully baked. However, let them cool entirely (if this is too hard for those as impatient as me, pop them in the fridge to move this process along). The result is a super fudgey moist brownie! However, the almond extra was a very strong flavor. It was sooo yummy, but I think it took away from the white chocolate flavor. Next time I will only try vanilla extract. One warning: these are addicting!!

Wednesday, March 2, 2011

S'mores Whoopie Pies

What could be better than a S'mores AND a gob?!


Yes, I live in western pennsylvannia and here, we call them gobs! I first found this genious idea at BrownEyedBaker, check out the full recipe here.  The only flop was that I thought it would be safe to use butter flavored shortening for the marshmellow frosting. Do NOT make this mistake! It took on way too much of a butter flavor.

To make the "graham flour" for the cookies, I took sheets of graham crackers, and ground them up in my mini chopper (or you could use a regular food processor) to make a super fine flour.


I also sped up the process of making the chocolate filling by putting it in the refrigerator.
 I chilled it for about 30 minutes. It was still pretty runny- but yummy! Next time, I think I will try to cool at room temperature like the recipe reads and see if that helps!


 These were a huge hit, and really cute. I can't wait to make them again and not mess up the marshmellow cream part!!

Monday, February 14, 2011

Red Velvet Gobs with Cream Cheese Filling & Strawberry Gobs with Marshmellow Cream

Happy Valentines Day! I whipped up these for my Valentine treat! I wanted to be festive, and the hubby loves Red Velvet, and I wanted to make gobs (aka whoopie pies). I choose red velvet with cream cheese filling and strawberry with marshmellow filling. I thought the pink and red would be super cute! 

I adapted this cake mix recipe for both of them:
  • One box cake mix
  • 3 eggs
  • 3/4 cup water
  • 1/2 cup oil
  • 1 4oz box instant pudding mix
Beat all ingredients until mixed well. Bake at 350 for 12-15 minutes. I used an average cookie scoop, and they took around 13 minutes, if you want bigger gobs adjust your cooking time!

For the red velvet, I used one Red Velvet cake mix, and one instant chocolate pudding mix. I used a simple cream cheese recipe:
  • 8 oz cream cheese (softened)
  • 1 1/2 sticks butter (softened)
  • about 2-4 cups powdered sugar (depending on how thick of a frosting you like)
  • 1 tsp vanilla

For the Strawberry Gobs I used one box of strawberry cake mix, and one box of strawberry cream instant pudding. I added a few drops of red food coloring to make the batter a little more pink! For the filling:
  • One 7 oz container marshmellow fluff
  • 1 1/2 sticks of butter
  • about 2 cups powdered sugar
  • 1 tsp vanilla
Again, add more sugar for a thicker frosting, add a tablespoon of milk if your frosting gets too thick.

 These bake up to be a thin, cake like cookie, which was yummy but not the typical thickness of a gob cake. My valentine treats did inculde some short cuts (aka cheating!) like cake mixes, but for a fun festive treat i let it slide! The winner?? Both were a big hit with the hubby and family, but I think the red velvet ended up with more votes!

Saturday, February 12, 2011

Oatmeal Cream Pies


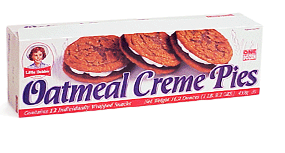
Who doesn't love Little Debbie?? Eating those individually packaged Oatmeal Cream Pies takes me right back to the elementary school lunch room. Unfortunately, we now LOOK at that little(or big) list called the nutrition label, with all those words you have never heard of (what is Ammonium Bicarbonate?!). Then I came across these these !! Homemade oatmeal cream pies! How have I never thought of this before?


I had to make them. You should too. I promise you won't be disappointed! I couldn't believe how much the cookie part tasted just like the oatmeal cookie Little Debbie makes! Only better! and made out of words we can pronounce!
My little sister,sous chef, and lover of all things dessert, Molly, helped me embark on this recipe (she was just as excited as I was)!


Oatmeal Cream Pies (from “The Amish Cook’s Baking Book”)  
  • 3/4 cup (1 1/2 sticks) unsalted butter, softened
  • 2 cups packed brown sugar
  • 2 large eggs
  • 1/2 teaspoon salt
  • 2 cups all-purpose flour
  • 1 teaspoon baking powder
  • 1 teaspoon ground cinnamon
  • 2 cups quick-cooking rolled oats
  • 2 teaspoons baking soda
  • 3 tablespoons boiling water


Preheat the oven to 425 degrees F. Lightly grease a baking sheet and set aside (or use parchment).
Cream the butter, sugar, and eggs in a large bowl. In a separate bowl, mix together the salt, flour, and baking powder. Add to the creamed mixture. Add the cinnamon and oats. Mix well. In a small dish, add the baking soda to the boiling water, and then stir the mixture into the rest of the batter. Mix well. Drop by the tablespoon (I used an oversized cookie scoop) onto the baking sheets about 2 inches apart and bake until the cookies are firm and just starting to turn golden around the edges, 10 to 15 minutes. Cool the cookies on a wire rack or a plate. I cooked mine for about 12 minutes.


     For the filling I went hunting for a marshmellow cream recipe from scratch (why make homemade oatmeal cream pies and sell out on store bought marshmellow fluff? Although, it could be a time saver, if you'd like!) I found this recipe at marthastewart.com. Unfortunately, after a solid 12 minutes of beating, I never had stiff peaks form in the process! My guess is two things could have been the culprit: I got some yolk in with my egg whites, and they were not at room temperature. It didn't cause too much of a problem, just caused the filling to be less creamy or more runny:

(okay, we may have really slathered that one!)
They were still delicous!!! Next time, I may try the filling that came with the original recipe. Check out How to Eat A Cupcake for the original recipe! This is a new favorite for sure! 

Sweet Cornbread

Not technically a dessert, but sweet and yummy! One of my husband's favorite side dishes at a local Mexican restaurant is their sweet corn cake. I have tried making boxed corn bread, but it is typically dry and bland. So I decided I would make my own, and looked for a sweet corn bread recipe. I landed on one at Allrecipes (of course!) and gave it a whirl! It was easy peasy, yummy and sweet.


Golden Sweet Cornbread (taken from Allrecipes.com)
  • 1 cup all-purpose flour

  • 1 cup yellow cornmeal

  • 2/3 cup white sugar

  • 1 teaspoon salt

  • 3 1/2 teaspoons baking powder

  • 1 egg

  • 1 cup milk

  • 1/3 cup vegetable oil

  • 
    Preheat oven to 400 degrees F (200 degrees C). Spray or lightly grease a 9 inch round cake pan.
    In a large bowl, combine flour, cornmeal, sugar, salt and baking powder. Stir in egg, milk and vegetable oil until well combined. Pour batter into prepared pan.
    Bake in preheated oven for 20 to 25 minutes, or until a toothpick inserted into the center of the loaf comes out clean. 

     Right out of the oven, I sprinkled the bread with a dusting of extra sugar on top. I used skim milk for the recipe, but next time I think I will try buttermilk or vitamin D milk, I think it would add to the consistancy of the bread.
    I served a warm piece to my hubby with a drizzle of agave nectar, and he loved it! 

    Tuesday, February 8, 2011

    Perfect Chocolate Chip Cookies

    Chocolate Chip Cookies. As my first post, what could be more appropriate than the back bone of all baked goods. Today after work, my husband requested chocolate chip cookies. "Really? How boring!" I thought. Until I remembered the amazing choclate chip cookies a co worker of mine makes! I quickly called her for the recipe, and was excited to try it. What makes the perfect chocolate chip cookie? I must tell you I was devoted to using the famous Toll House Chocolate Chip Cookie recipe. It was tried and true. How could Nestle possibly mess up at what they are best at? UNTIL i tried these!! They are just, perfect. They are just the right amount of crispy and chewy, and they bake up beautifully.


    Perfect Chocolate Chip Cookies:
    Preheat oven to 375
    • 3/4 cup shortening (butter flavored)
    • 1 3/4 cup light brown sugar
    • 2 tablespoons milk
    • 1 egg
    • 1 tablespoon vanilla  (yes, tablespoon)
    • 1 tsp salt
    • 1 3/4 cup flour
    • 3/4 tsp baking soda
    • 1 1/2 cup chocolate chips (I went ahead and used the whole bag!)
    Cream together shortening, sugar, milk, egg, and vanilla. Combine salt, flour, and baking soda, stir into wet ingredients.  Stir in choclate chips. Bake at 375 for 7-10 minutes, depending upon your preference.
    Cool on a wire rack for about 5 minutes and enjoy!!